Create a Cashback Campaign 🎉
Creating a cashback campaign allows you to incentivise customers with instant cashback, driving sales and engagement. This guide walks you through each step of creating a campaign in Hello Clever.
Navigating to Cashback Campaigns
To begin, first select the Site where you want to create a campaign. Then, within the selected site, choose Cashback Campaigns from the left menu. This will open the Cashback Campaigns page, where you can create and manage your campaigns.
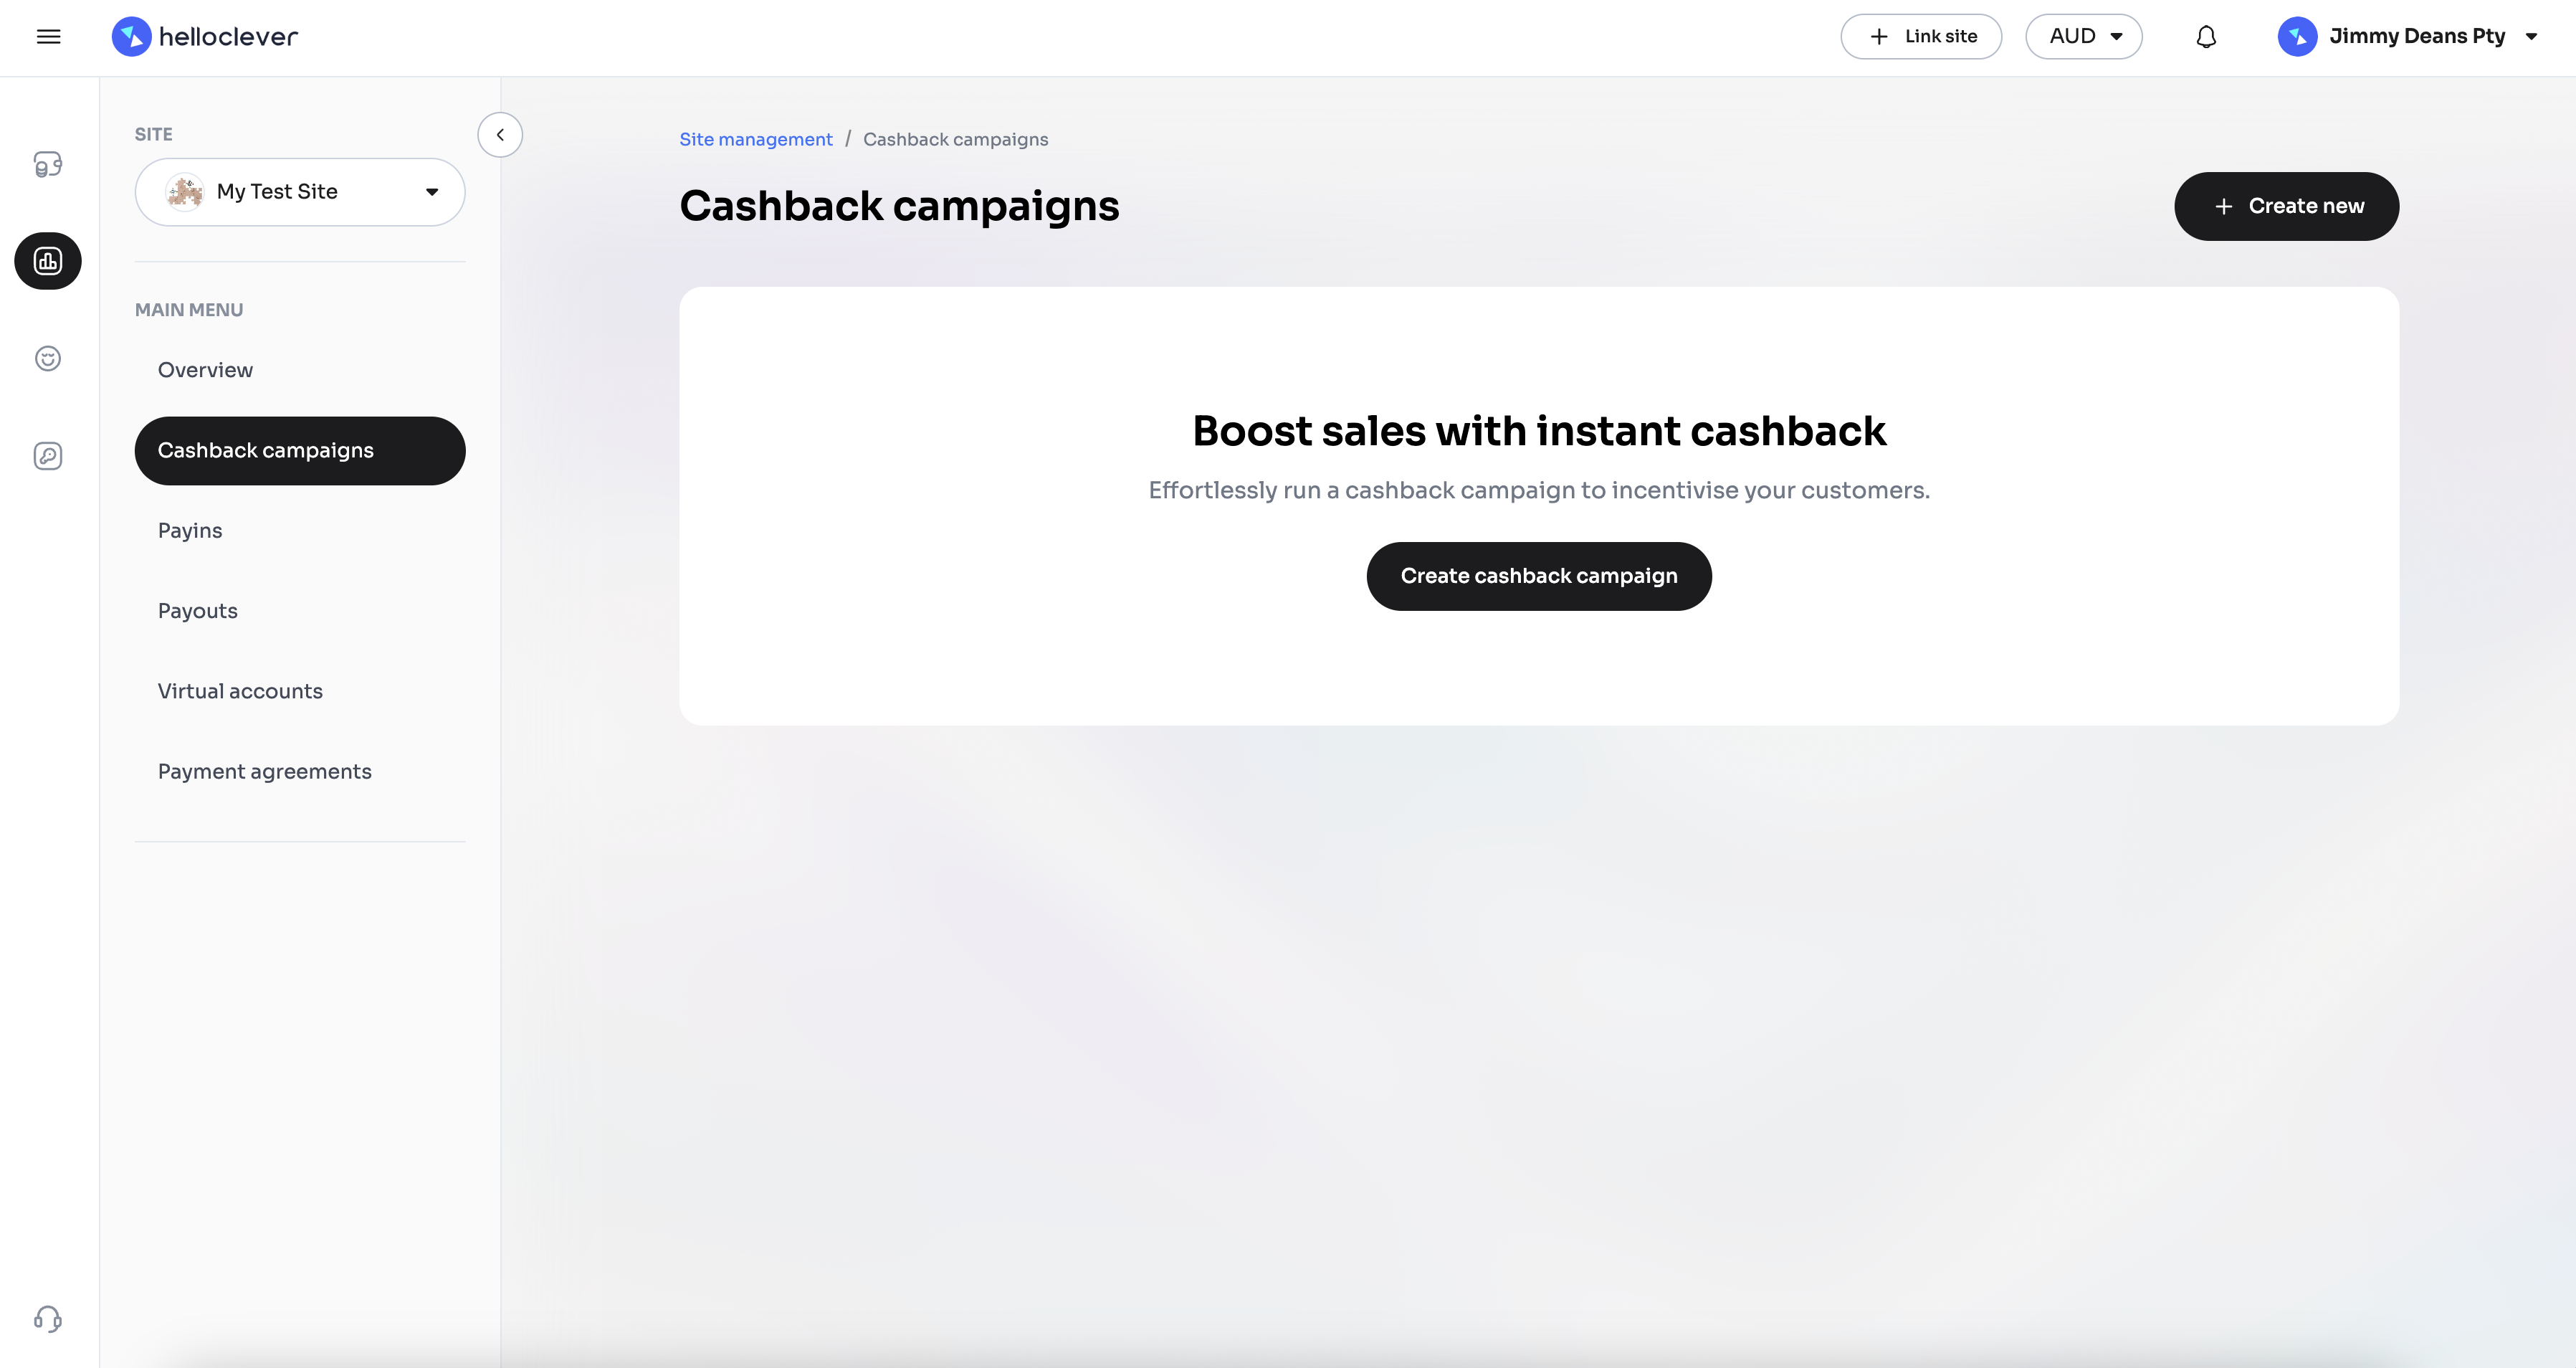
Click on the Create Cashback Campaign or Create new button to start a new campaign. This will open the campaign creation form, where you can set details and rules for your cashback offer.
Creating Your Own Campaign
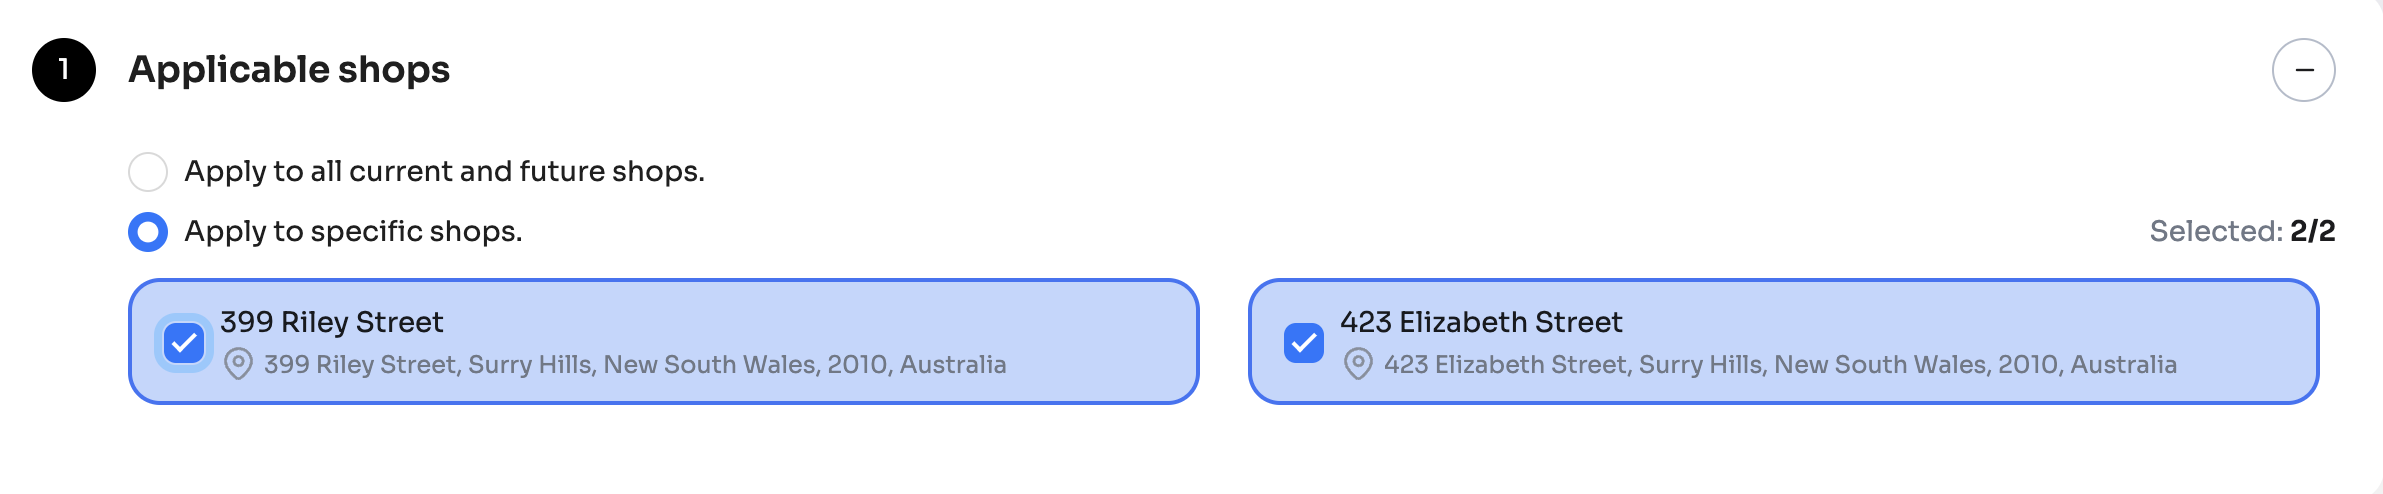
In-store Campaign: Selecting Applicable Shops
If your cashback campaign is for an in-store setup, you may select specific locations that will offer cashback to customers. Choose either:
- Apply to all current and future shops to cover all locations.
- Apply to specific shops to target selected locations.
Online Campaign: Selecting Applicable Payment Methods
For online campaigns, you can select specific payment methods that qualify for cashback. Choose among:
- PayID
- PayTo
- Card

Make sure to select payment methods that align with your customers' preferences to maximise campaign reach! If most of your customers use PayID, consider prioritising it for instant cashback benefits.
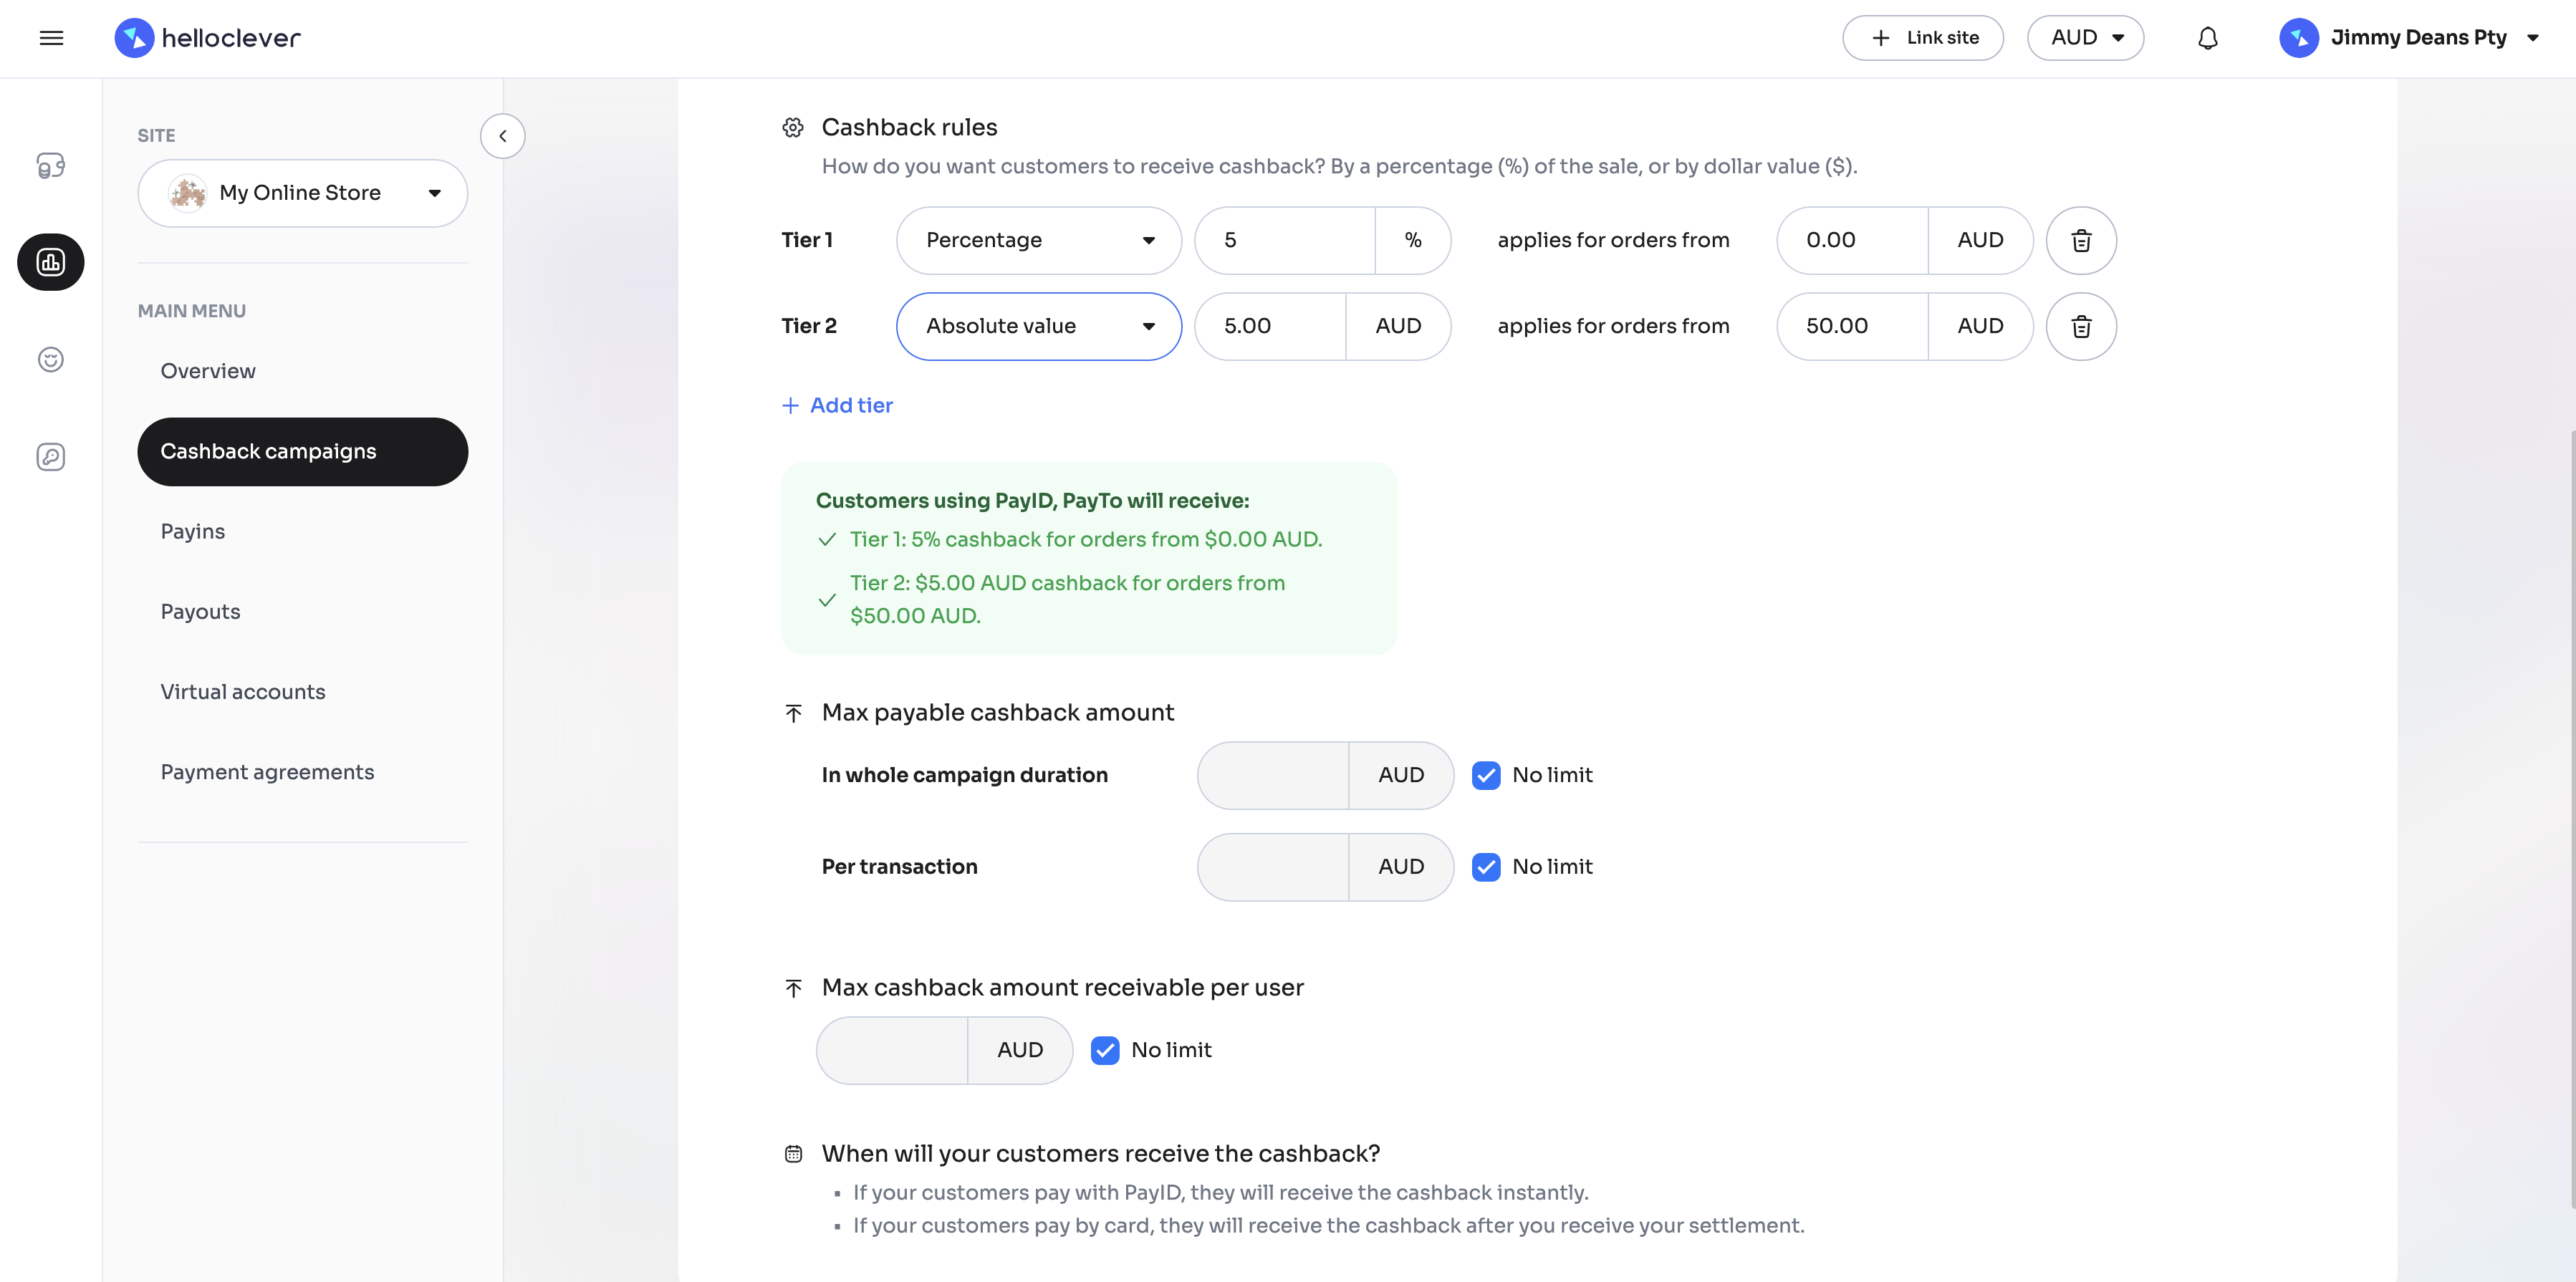
Setting Up Cashback Rules
In the Cashback Rules section, define how customers will earn cashback. You can set up multiple tiers to incentivise higher spending.
Cashback Rule Setup Mechanism
This section provides fields to customise how cashback is rewarded. Here's an explanation of each field:
-
Tier: Define multiple tiers to offer different cashback incentives based on order values. Choose between:
- Percentage: Offers cashback as a percentage of the order value.
- Absolute Value: Provides a fixed cashback amount.
-
Value: The cashback amount or percentage based on the type selected.
-
Applies for Orders From: Sets the minimum order value required to qualify for this cashback tier. For example, setting this to $50.00 AUD means that orders below $50 will not be eligible for cashback at this tier.
-
Add Tier: Allows you to add additional tiers with different cashback rules. This is useful if you want to encourage larger orders by offering higher cashback for higher spending.
-
Max Payable Cashback Amount: Limit the total cashback payout:
- In Whole Campaign Duration: Cap the total cashback available across the campaign.
- Per Transaction: Limit the maximum cashback per order.
-
Max Cashback Amount Receivable Per User: Set a maximum cashback amount that each customer can receive across the campaign. Use this if you want to prevent excessive cashback redemptions by the same user.
Use tiered cashback to encourage higher spending. For example, set 5% cashback for orders above $50 and 10% cashback for orders above $100 to motivate customers to increase their order size.
Examples of Cashback Rule Setups
- Example 1: Set a 5% cashback for orders starting from $0.00 AUD, encouraging all customers to make purchases.
- Example 2: Add a $10 AUD cashback for orders above $100 AUD to promote higher transaction values.
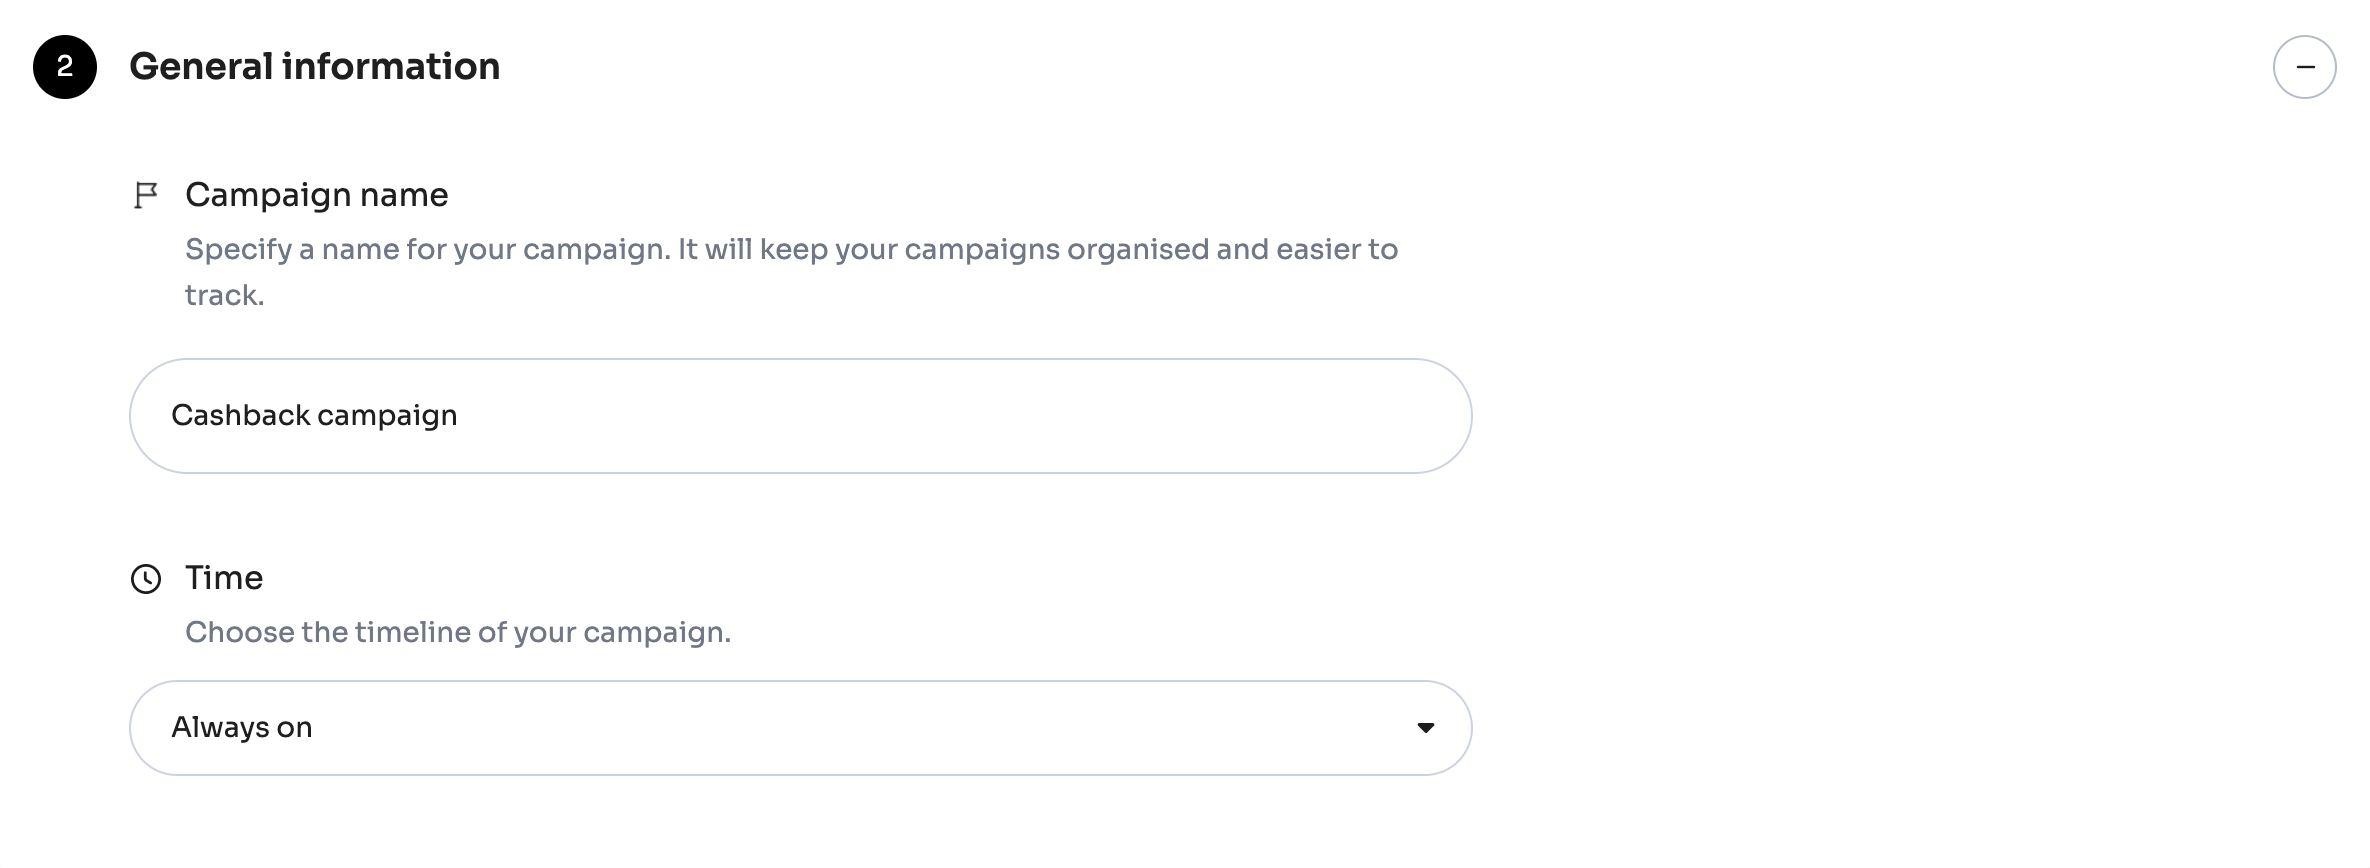
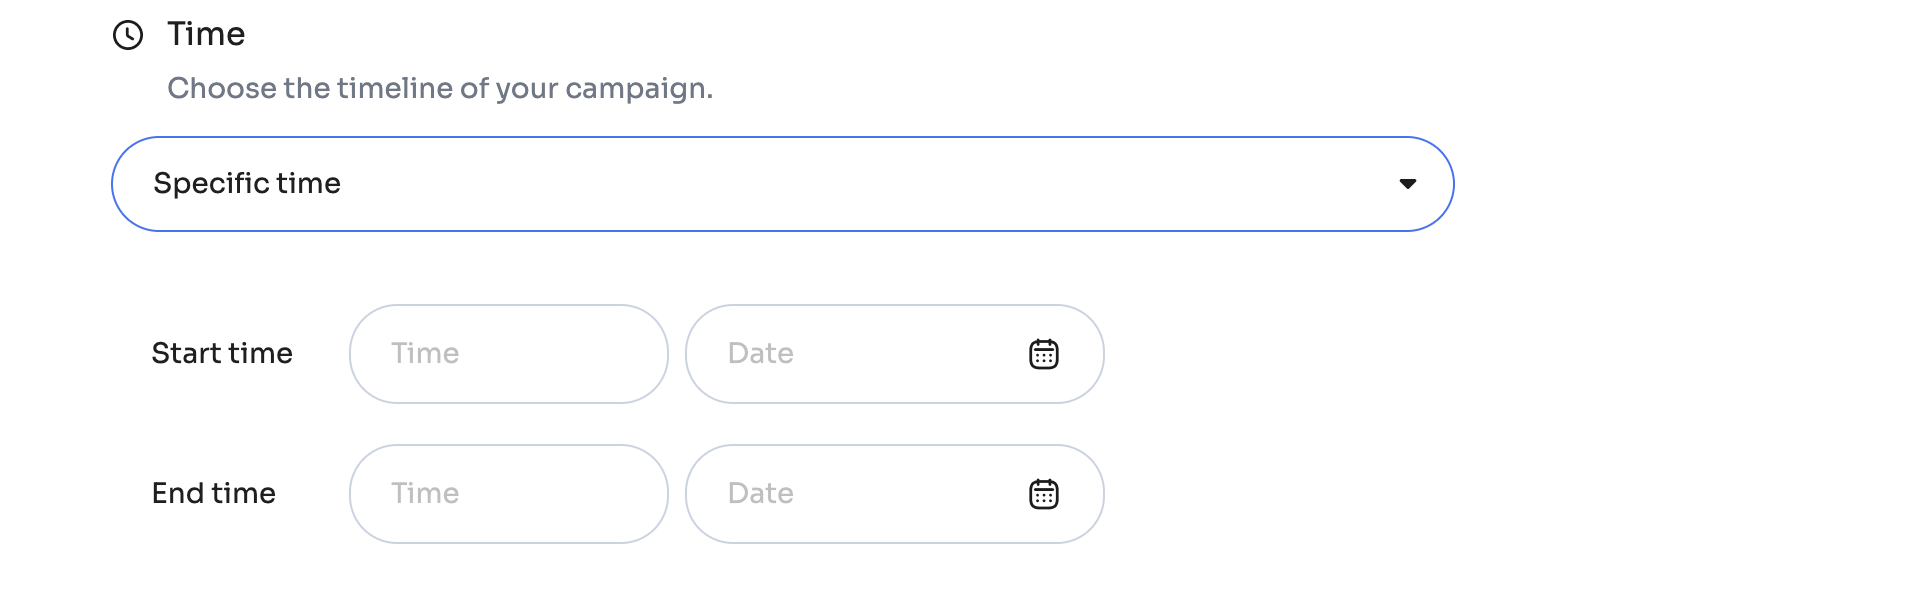
Setting Campaign Name and Timing
In the General Information section, specify the Campaign Name and Time for when the campaign will run. You have three options:
- Always On: The campaign is live indefinitely.
- Specific Time: Schedule the campaign for a specific start and end date. If a campaign is scheduled to start in the future, it will be automatically activated on the specified date.
- Repeat: Set recurring times, such as every weekend.
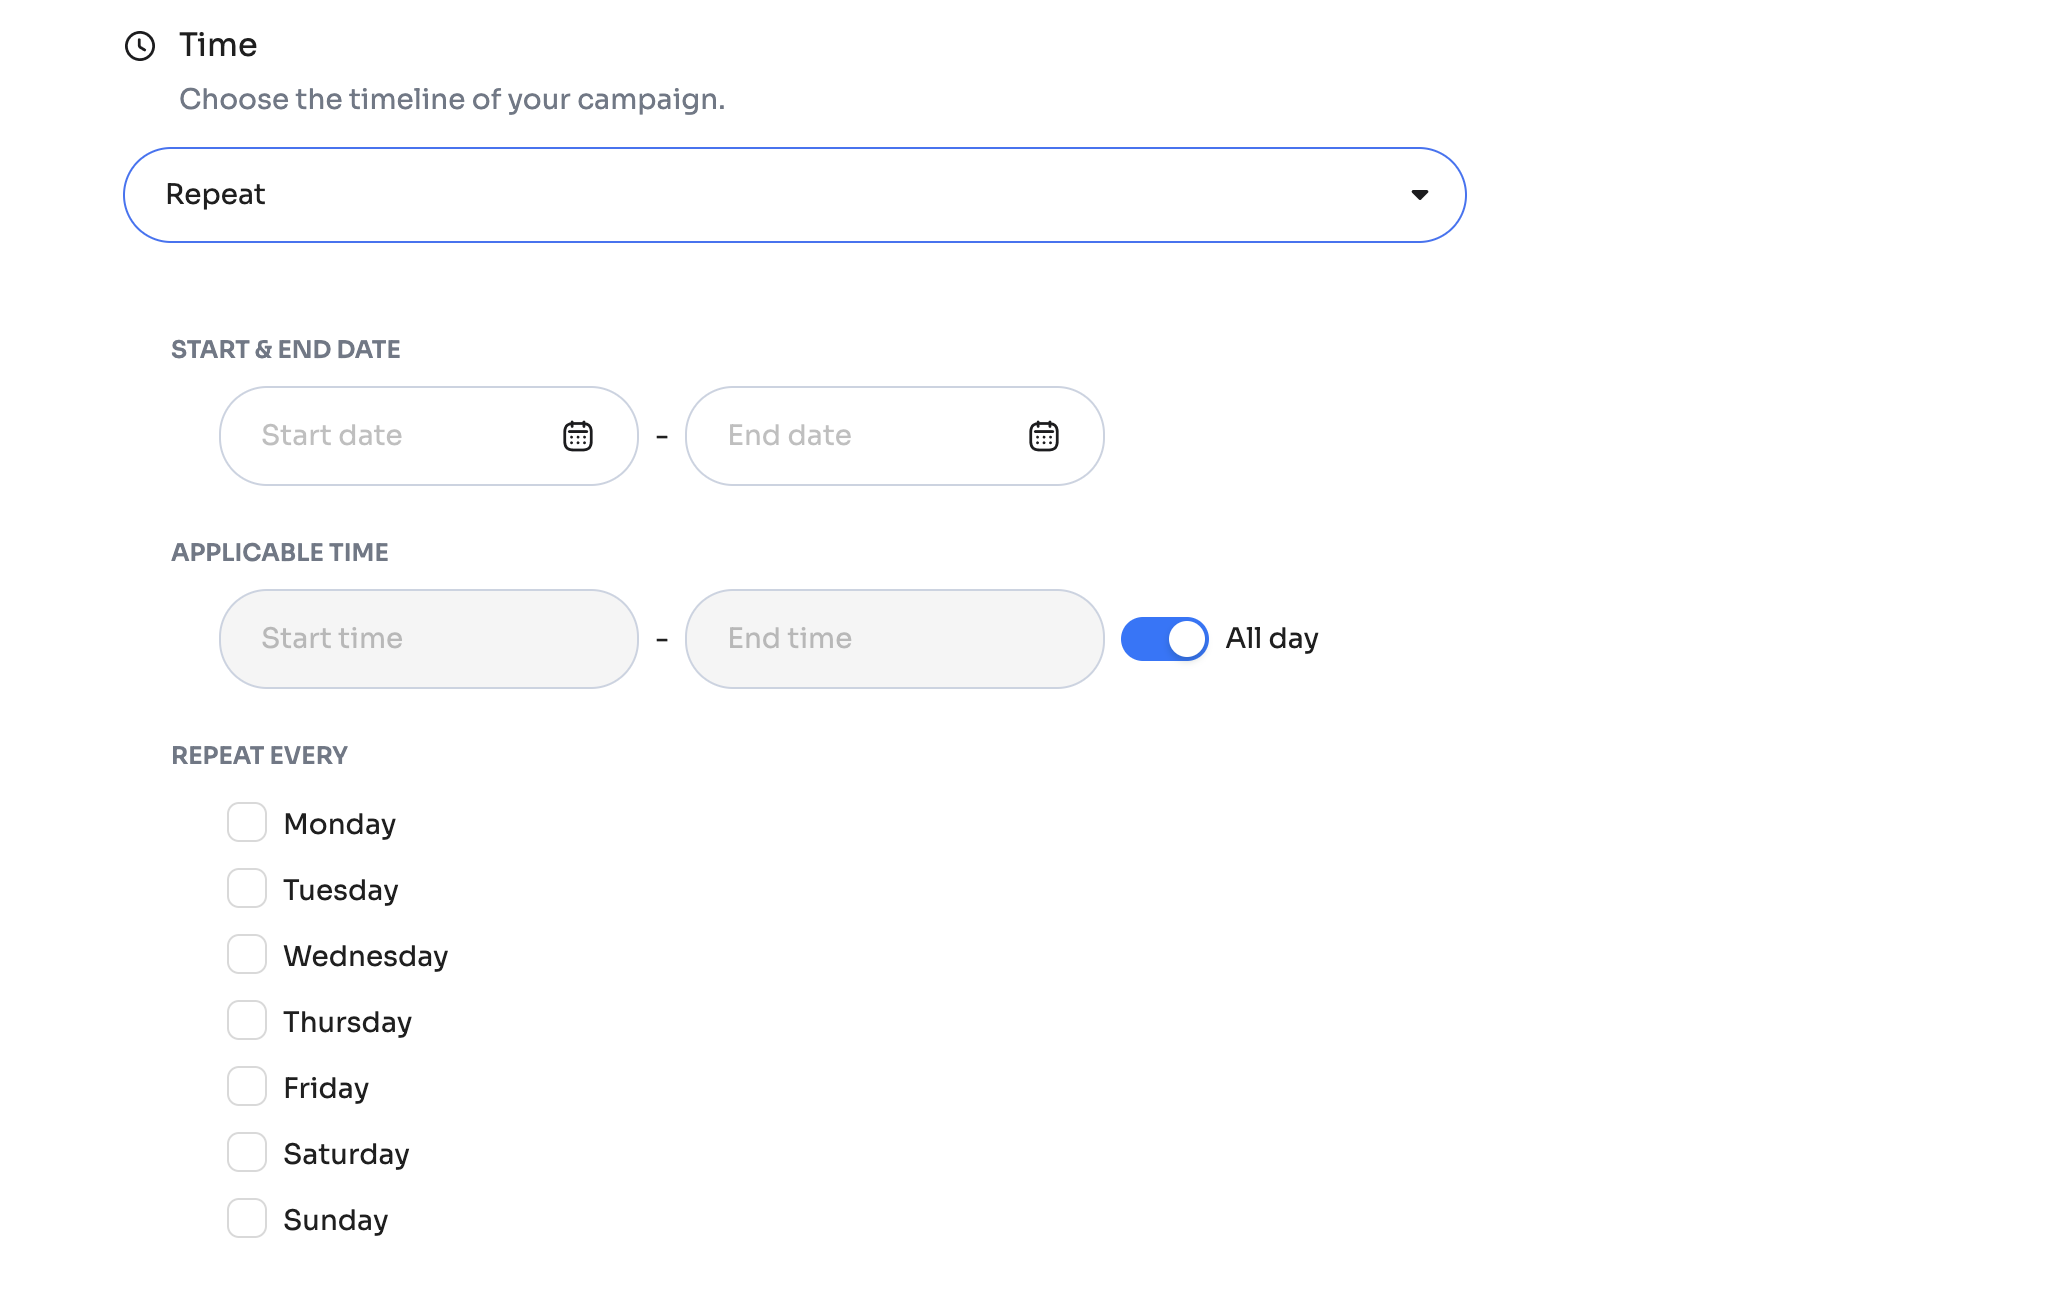
- Example 1: Run a weekend cashback of 10% every Saturday and Sunday to boost weekend sales.
- Example 2: Run a day-time cashback of 10% before the evening to boost sales during day-time.
Consider having an Always On campaign for your business. Consistent cashback availability can improve customer loyalty and encourage repeat purchases. You can run multiple campaigns simultaneously.
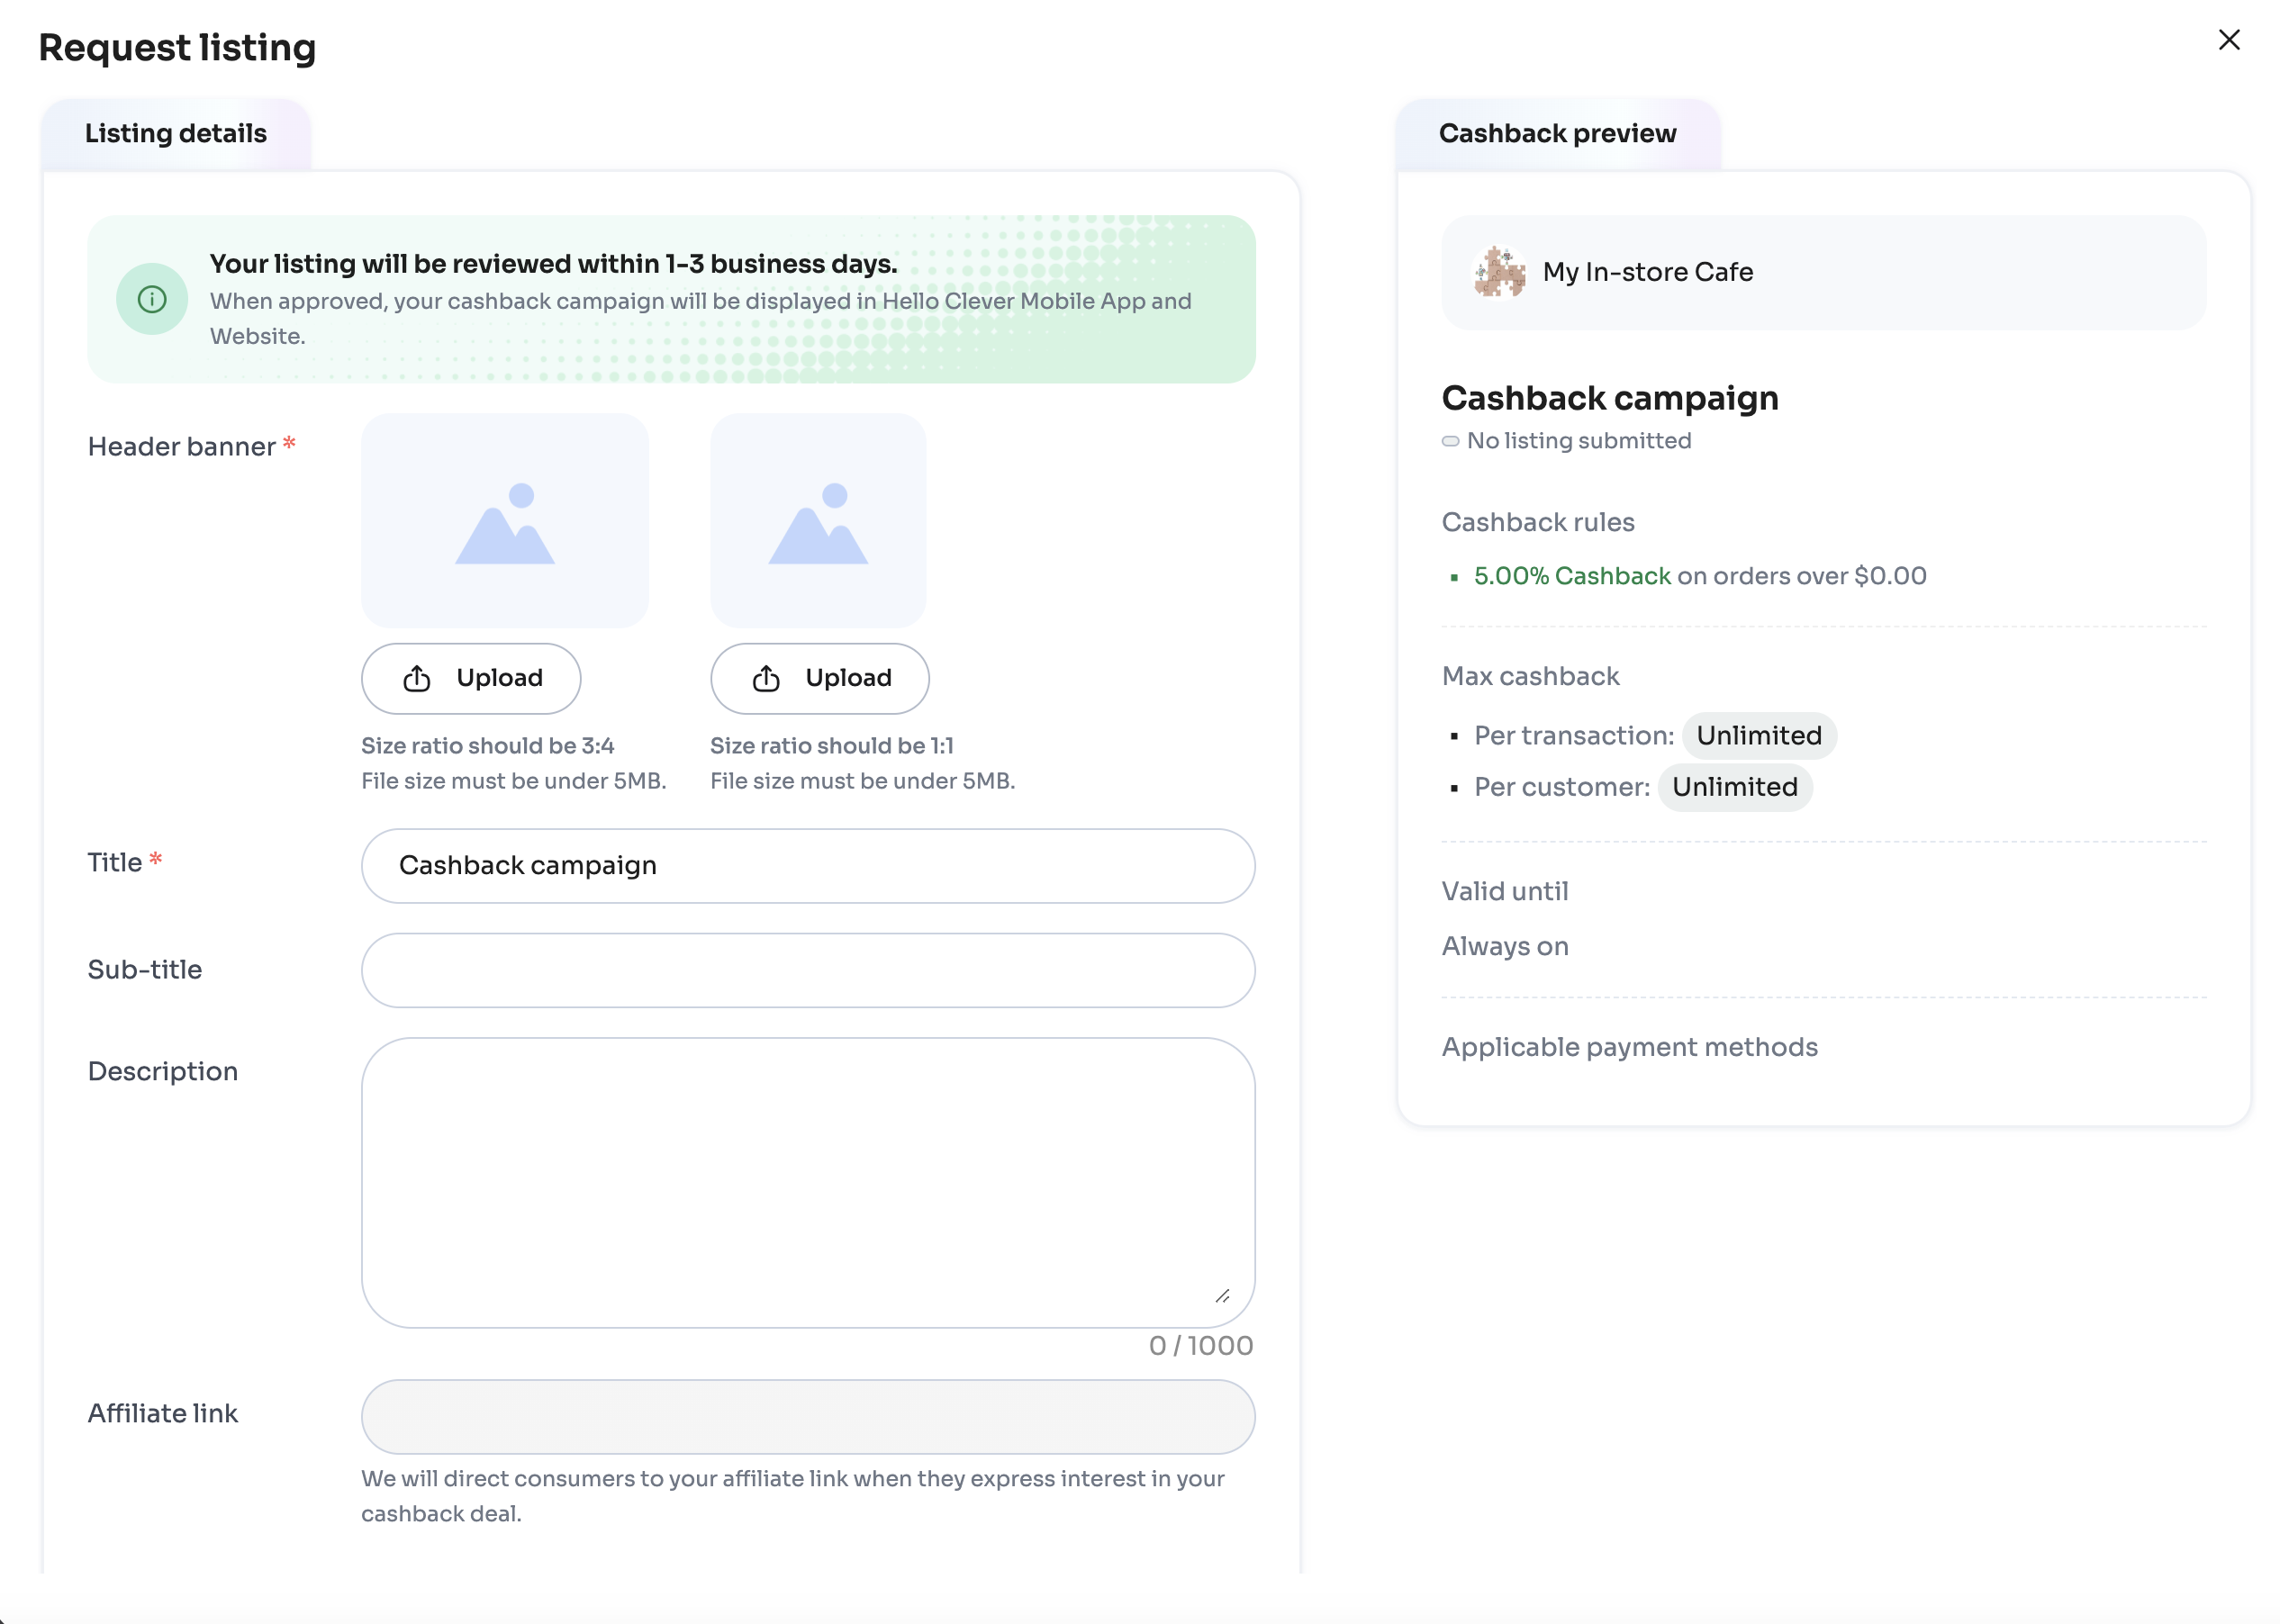
Publishing the Campaign
After configuring your campaign, click Publish to make it live or Publish & Request Listing if you want it displayed in the Hello Clever app.
Uploading Collateral for App Listing
To feature your campaign in the Hello Clever app, upload marketing collateral:
- Header banner images (3:4 and 1:1 ratios, max 5MB).
- Campaign Title, Subtitle, Description, and an Affiliate Link (optional).
This step ensures your campaign has visibility in the Hello Clever app and can attract a wider audience.
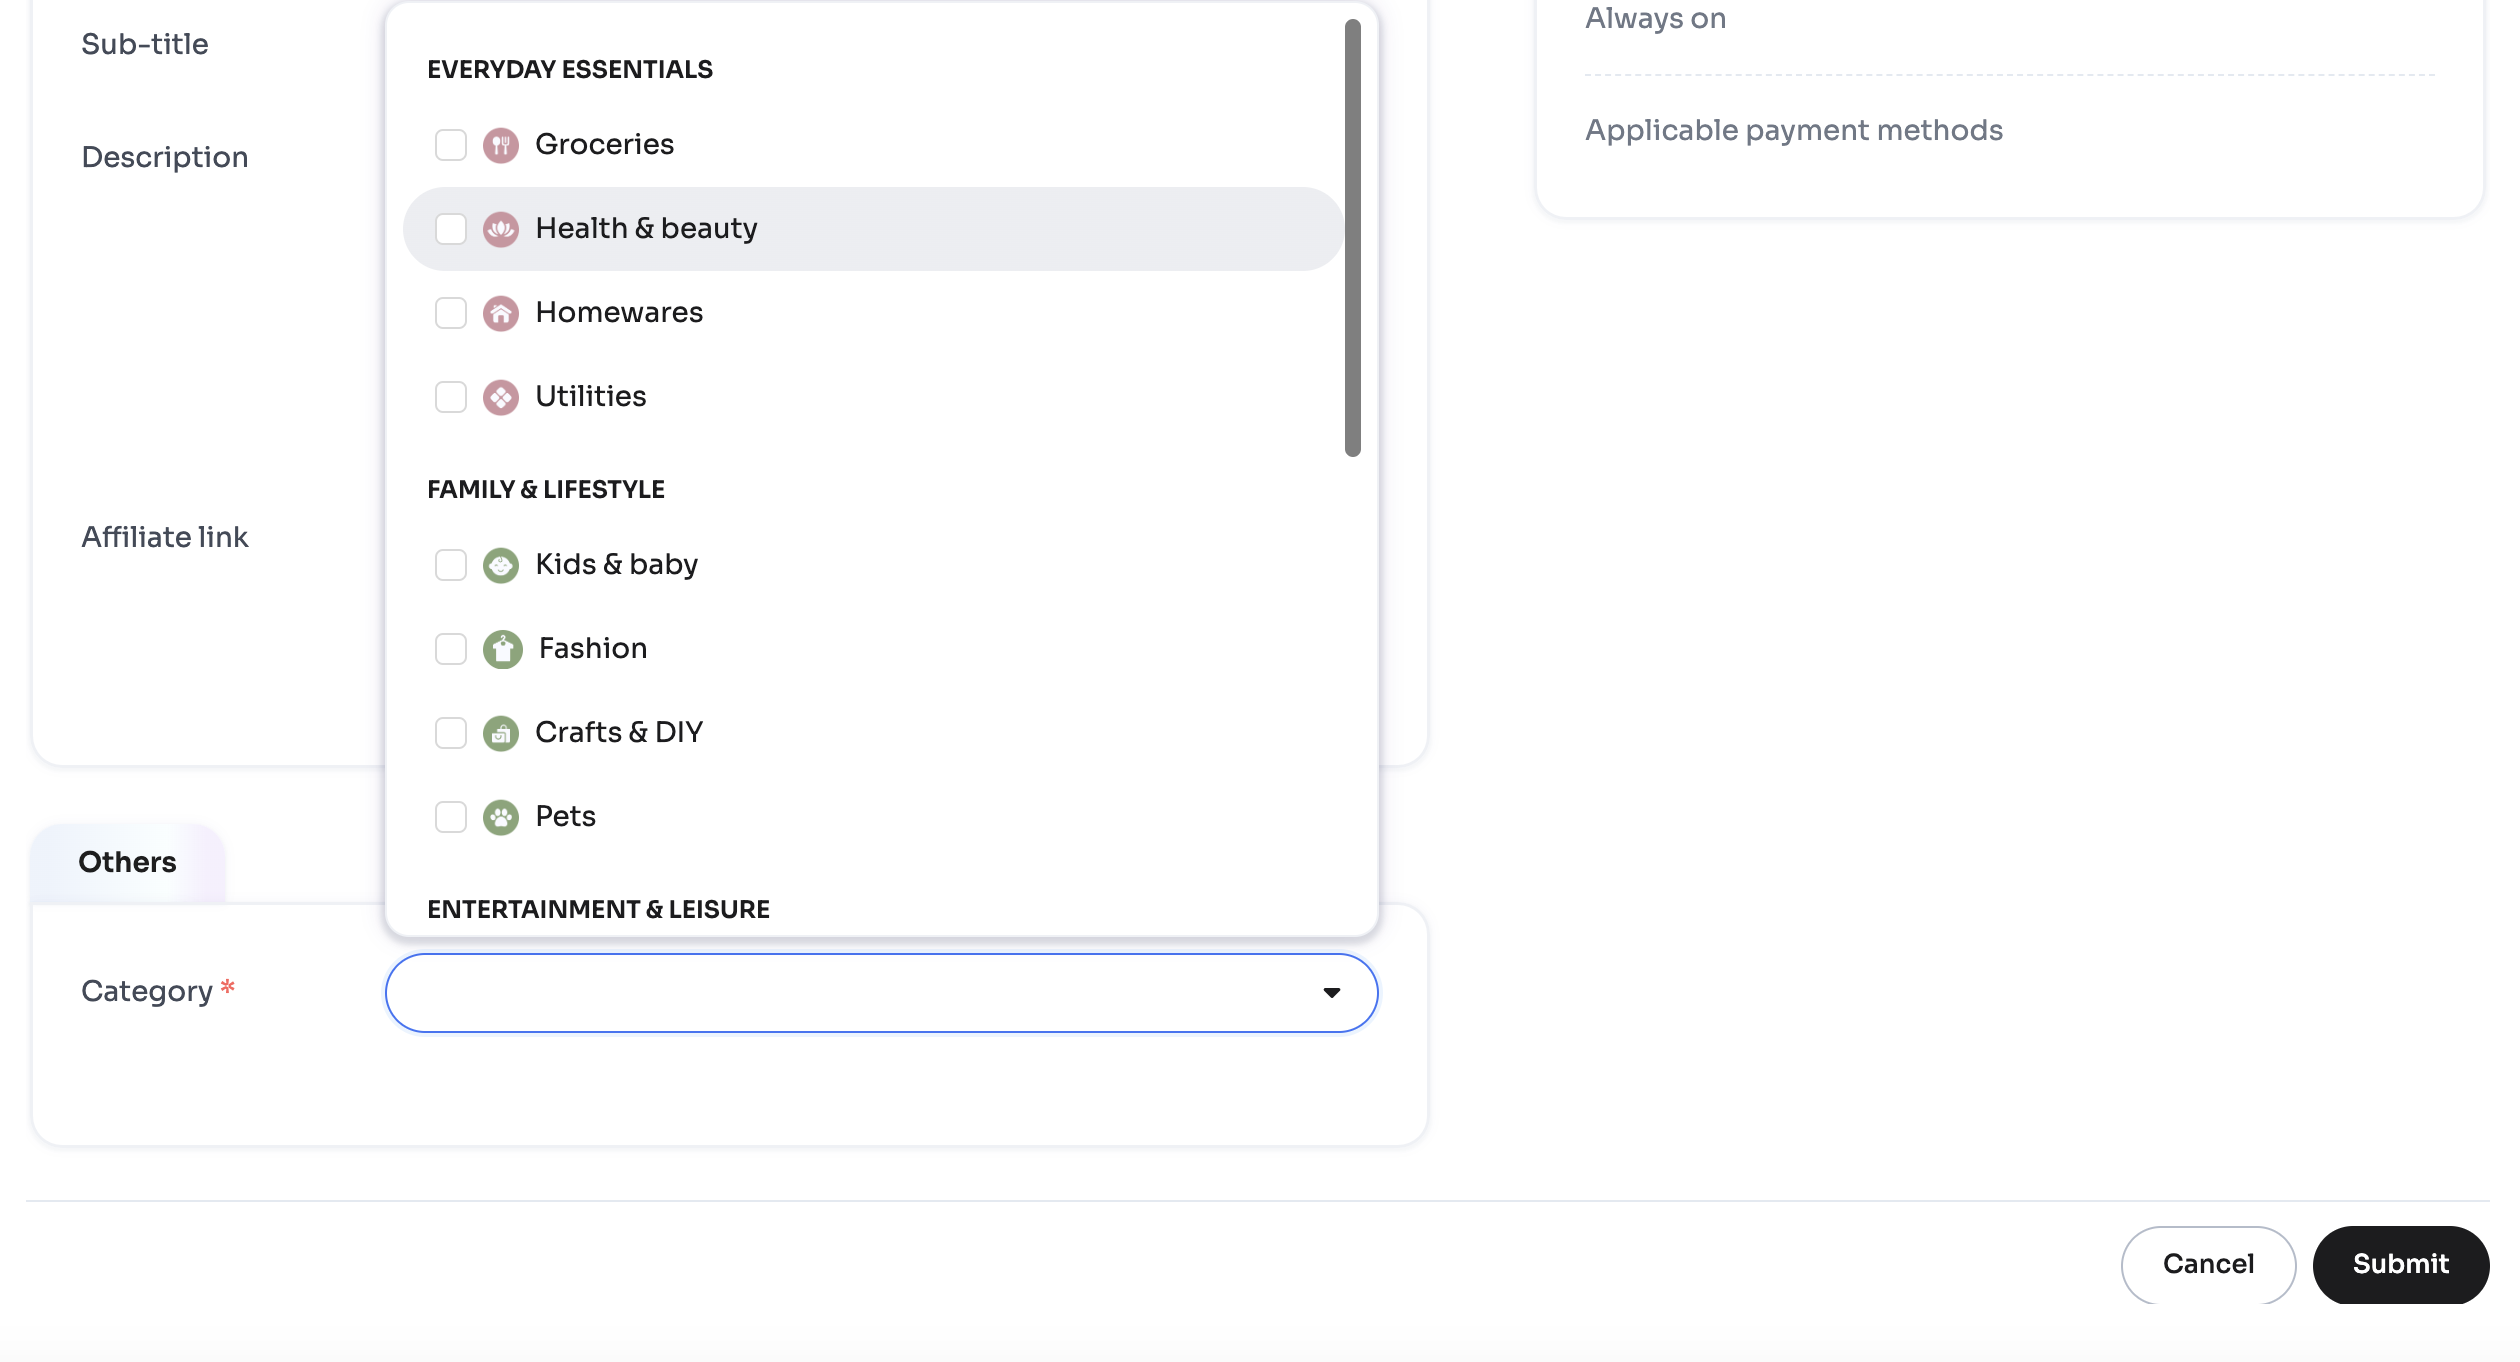
Additionally, select the most appropriate Category for your campaign. Choosing the right category ensures your cashback offer reaches your target audience within the app. For instance, if your campaign is related to health products, selecting the "Health & Beauty" category will make it more visible to users interested in this area, improving the chances of engagement and conversions.
After filling in the details, click Submit. Your listing will be reviewed and, upon approval, displayed in the Hello Clever app within 1-3 business days.
Make sure your images meet the size requirements (3:4 and 1:1 ratios, max 5MB) to avoid issues during submission
By following these steps, you can create an effective cashback campaign to boost customer engagement and drive sales.